Recognizing Common Failures
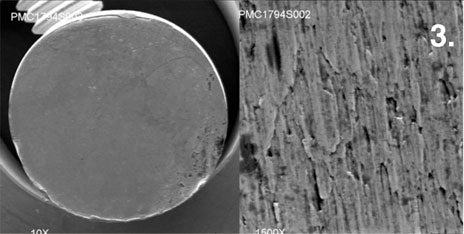
There are six types of metallurgical failures that affect fasteners. Each type has unique identifying physical characteristics. The following examples are designed to be used like a spark plug reading chart to help analyze fastener failures. While few of us have access to sophisticated analysis equipment, a standard Bausch and Lomb three lens magnifying glass will generally show 98% of what we want to see. Several of the photos below have been taken utilizing a Scanning Electron Microscope (SEM) and are presented to simply illustrate typical grain configurations after failure.
1. Typical Tensile Overload In a tensile overload failure the bolt will stretch and “neck down” prior to rupture. One of the fracture faces will form a cup and the other a cone. This type of failure indicates that either the bolt was inadequate for the installation or it was preloaded beyond the material’s yield point.
2. Torsional Shear (twisting)
Fasteners are not normally subjected to torsional stress. This sort of failure is usually seen in drive shafts, input shafts and output shafts. However we have seen torsional shear failure when galling takes place between the male and female threads (always due to using the wrong lubricant or no lubricant) or when the male fastener is misaligned with the female thread. The direction of failure is obvious and, in most cases, failure occurs on disassembly.3. Impact Shear
Fracture from impact shear is similar in appearance to torsional shear failure with flat failure faces and obvious directional traces. Failures due to impact shear occur in bolts loaded in single shear, like flywheel and ring gear bolts. Usually the failed bolts were called upon to locate the device as well as to clamp it and, almost always, the bolts were insufficiently preloaded on installation. Fasteners are designed to clamp parts together, not to locate them. Location is the function of dowels. Another area where impact failures are common is in connecting rod bolts, when a catastrophic failure, elsewhere in the engine (debris from failing camshaft or crankshaft) impacts the connecting rod.4. Cyclic fatigue failure originated by hydrogen embrittlement.
Some of the high strength “quench and temper” steel alloys used in fastener manufacture are subject to “hydrogen embrittlement.” L-19, H-11, 300M, Aeromet and other similar alloys popular in drag racing, are particularly susceptible and extreme care must be exercised in manufacture. The spot on the first photo is typical of the origin of this type of failure. The second is a SEM photo at 30X magnification.5. Cyclic fatigue cracks propagated from a rust pit (stress corrosion)
Again, many of the high strength steel alloys are susceptible to stress corrosion. The photos illustrate such a failure. The first picture is a digital photo with an arrow pointing to the double origin of the fatigue cracks. The second photograph at 30X magnification shows a third arrow pointing to the juncture of the cracks propagating from the rust pits. L-19, H-11, 300M and Aeromet, are particularly susceptible to stress corrosion and must be kept well oiled and never exposed to moisture including sweat. Inconel 718, ARP 3.5 and Custom age 625+ are immune to both hydrogen embrittlement and stress corrosion.6. Cyclic fatigue cracks initiated by improper installation preload
Many connecting rod bolt failures are caused by insufficient preload. When a fastener is insufficiently preloaded during installation the dynamic load may exceed the clamping load resulting in cyclic tensile stress and eventual failure. The first picture is a digital photo of such a failure with the bolt still in the rod. The arrows indicate the location of a cut made to free the bolt. The third arrow shows the origin of the fatigue crack in the second picture – an SEM photo at 30X magnification that clearly shows the origin of the failure (1), and the telltale “thumbprint” or “beach mark” (2). Finally (3) tracks of the outwardly propagating fatigue cracks, and the point where the bolt (unable to carry any further load) breaks-away.


